Naming Convention
CAD- Websites, Hints and Tips
CAD Tips
teknigroup.com/tutorials/Inventor/Parameter-iProperties.html
This link shows how you can automatically bring a size into a part description. – Neat!
Finally figured out how to make a dimension drive an entire assembly. *ugh* ( I love ProE) Create an excel file. Create a name, and a value. Link this excel file in with Parameters.
Dynamic Inventor bumper frame created. Uses short length, long length, and bumper overhang as driving values. Assembly based on center plane. Used Save a copy and replace file to make the second version.
A good idea is to have a common naming system.
http://www.caddmanager.com/CMB/2009/06/cad-standards-file-naming-convent…
I’d like to recommend that we use subsystem prefixes-
So all files associated with the drive base would be named DR-. For example DR_side_rail
Drive base DR
Hang H
Ball Control BC
Shooter Sh
Try to get the name right to begin with. Moving files around, and renaming them can cause issues.
Also work to save to the shared directory. If you don’t have access to the shared directory, BUG REES NOW. We definitely want to avoid relying on thumb drives.
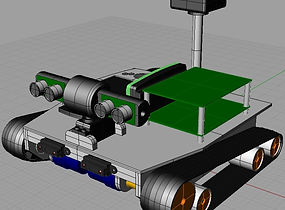
For many members of the robotics team is having to CAD (designing a component in a Computer Aided Design program) a piece before building. “Let’s just do it, and then we can CAD”, “I want to start fabrication, enough of this”. And the worse part, after CADing, the piece is then placed onto the virtual robot to see where best to put it. ARRRGGGGG!
There is a real reason to do this, and at least two members of the team learned this last night, or I think they did, if they were paying attention. The students were working on the design of the robot lifting winch, they did a nice job of getting it done, and then were more than ready to make it, after all we just got a major piece of it delivered yesterday, so why not?…..But….placing the winch onto the frame, we saw that there was only a few hundredths of an inch between it and the frame members, that was a bit close. So, what to do? Simple, reopen the CAD file and change one piece. Nothing wasted, ready to cut Thursday. A little of work ahead saves money and time in the future.
A little lesson learned, not only about building robots, but hopefully about almost anything.
Why CAD? Let’s Build.